
My mother and I are working away on the pillows for the venue benches, and I was thrilled when we recently discovered Clover’s Kanzashi Flower Maker tools for crafting fabric flowers. We found our templates at Tuesday Morning, but my mom has also seen them at her local quilt shop. They’re really easy to use: if you can count and manage a basic needle and thread, you can create beautiful fabric flowers!
There are a variety of different kinds of flowers, and most of the templates come in sizes ranging from extra-small to large. The flowers featured here were made with the small and large “Round Petal” templates, the large “Daisy” template, and the small and large “Gathered Petal” template.

Clover’s Kanzashi Flower templates
Each template comes with detailed, illustrated, and easy to follow instructions, so I’ll just note the basic process and highlight a few tips based on my work with the templates so far.
For all of the templates, the process is the same: cut your fabric into small squares (one per petal), fold the fabric into the template, then stitch the petal following the numbered template guide. The photos show a large “Gathered Petal” flower in process in a sheer white voile.


After removing the template, pull the thread to create the petal and shape it, and then repeat with the next square of fabric. The softer the fabric, the more organic the shape.


The number of petals needed to complete a flower varies with the type of flower and template. Once you’ve completed all the petals, stitch the last petal to the first. The center will typically need to be stitched close or be covered with a button or another embellishment. Flowers of different sizes can be layered as well.

Embellished with a bead!
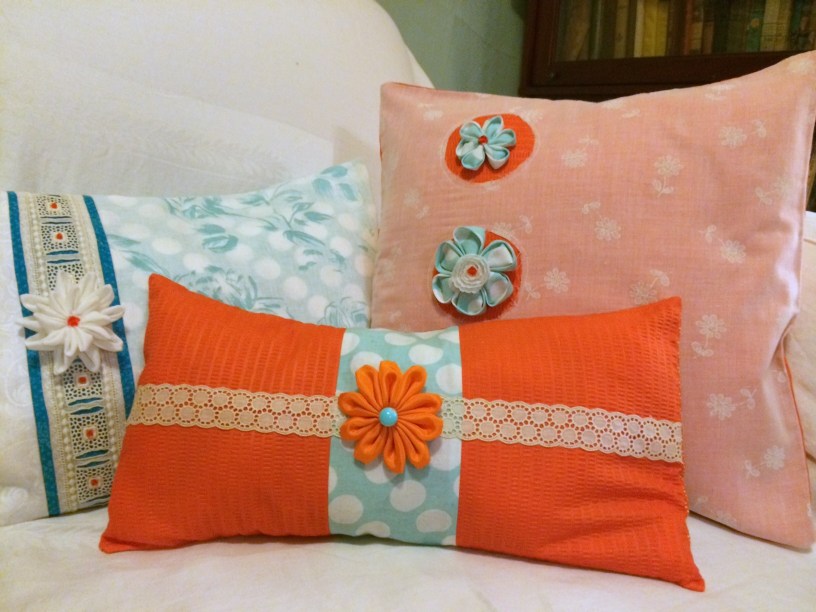
I’ve also made a large “Daisy” in bright orange taffeta, and large and small “Round Petal” flowers in a pale aqua cotton with large white polka dots.


A few tips:
- The back of the flower is often as pretty (or prettier) than the designated front. This was true of the orange taffeta Daisy!
- The dimensions for the fabric squares included in the instructions are, I’ve found, always larger than needed, which results in waste. Cut one square and see how it works for you. I shaved a 1/4 to 1/2 an inch off in most cases.
- Softer fabrics result in more organic-looking flowers, but those with a little more body are easier to shape (and hold the shape better).
- Scissors with narrow blades like those shown above make it easier to trim close to the template.
- Sew on pin backs to the flowers to make them easy to remove for laundering, or to re-purpose.
I’m using the flowers to embellish pillows, but they could also adorn a bag, hat, or belt, or be worn as a brooch.
Enjoy!
You might also like to see DIY Decor: Pieced Pillow Covers for info on how we’re designing and piecing our pillows, or DIY Decor: Pillows in Progress, or Making a Beautiful Mess for more thoughts on crafting and love.

Wonderful idea, I can’t wait to try it out! 🙂
Keep up the great work!
Love, Isabella
LikeLike
Thanks, Isabella! They’re fun to make.
LikeLike